This was originally posted on the Tamagotchi Collector's Discord, but I figured it should live outside of Discord too. In a place where nobody will ever see it lol
A Tamagotchi mystery has been solved.
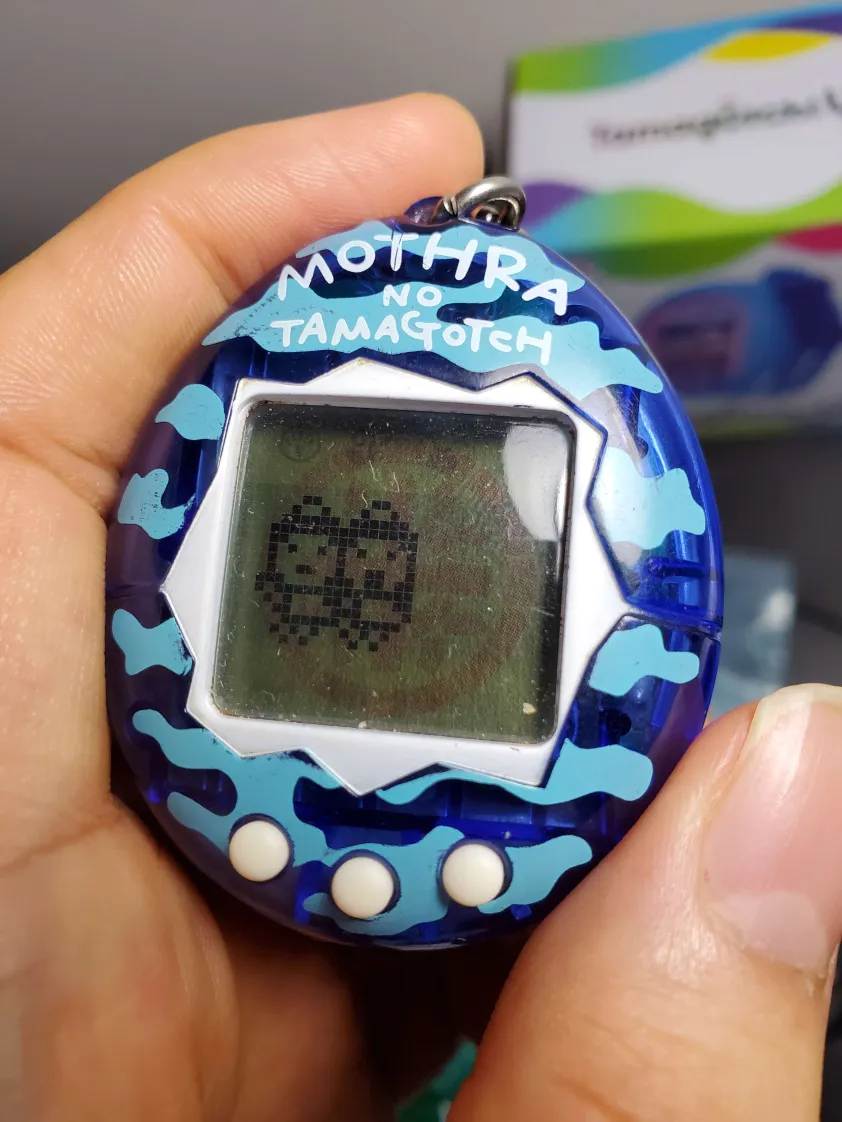
After years of debate whether this was even possible, I proved that, in fact, you can raise the secret Twin characters Moll & Lora on the Mothra Tamagotchi.

The ROM for the Mothra was dumped in May 2024 and I figured out how everything worked by studying the code. (similar to the P1 analysis I ran in 2023, which there are pages about on this site)
Moll & Lora Guide: The gritty details
- Moll & Lora evolve from Mothra Leo (basically: no care mistakes and catch all Justice calls)
- Keep weight in the 70s. Do not make any care mistakes as Mothra Leo. After approximately 80 waking hours (the time is somewhat random — 80 hours is a worst case), an internal flag is set that allows Moll & Lora to evolve, and allows Mothra Leo to lay an egg when it dies.
- One way to tell that this timer has passed is that the Mothra starts dropping hearts more quickly; however if the immortality strat is used to prevent death from sickness, it will not drop hearts more quickly so it is not possible to tell when the threshold is reached.
- Suggested strat to keep weight in the 70s once in there — don’t fill hearts until 1 happy and 1 hungry are both empty. Feed it then play the game. Weight is not decremented until the results screen is displayed, so if you are losing you can exit out and try again. Also, note that if you get a 5 vs 0 game win, the Mothra actually decrements TWO weight (and increases happy hearts by 2) so you may want to quit out if you are at 4 correct.
- Note that due to the timing of hearts emptying, every once in a while 2 happy hearts will decrement for a single hungry. So I advise that you start at 78 tons to give yourself some wiggle room — the Mothra will naturally lose a few tons over time due to this.
- After the 80 waking hours have passed, kill Mothra Leo with care mistakes (happy and/or hungry hearts empty; leaving the lights on does NOT count towards these care mistakes); 5 care mistakes will kill it. You can basically just let both happy/hungry hearts empty out and not fill them. It only takes a couple hours to die from care mistakes at that stage.
- Dying of sickness does NOT work and will cause the internal flag to reset.
- When Mothra Leo dies, it must lay an egg or that means the conditions for Moll & Lora were not met and the process needs to be repeated.
- It is possible for Mothra Leo to lay an egg even if the conditions for Moll & Lora were not met (i.e. if care mistakes were made too early or if it didn’t have weight in the 70s at the time the checks were made to set the flag)
- Any adult can lay an egg when it dies, but only Mothra Leo can lay an egg that will eventually transform into Moll & Lora.
- If it did lay an egg, press A+C to get a new egg (do NOT reset the device because that will reset the internal flag).
- It’s always possible to press A+C to get a new egg, even if the Mothra didn’t lay an egg. But only the specific conditions with Mothra Leo allow Moll & Lora to be raised.
- Raise the new Mothra to Mothra Leo, then again keep the weight in the 70s and make no care mistakes. After approximately 80 waking hours, Mothra Leo will evolve to Moll & Lora.
- So basically you need to raise Moll & Lora twice to actually get them. Lol
- Note that the process to raise Moll & Lora can be repeated — after approximately 64 waking hours, if Moll & Lora are killed with care mistakes, they will lay an egg when they die. This new Mothra can then be raised into Moll & Lora, and the process can repeat indefinitely.
- You might be wondering how long this all takes. I started my log on May 11th 2024 and got the twins on June 5th 2024. So it takes about 3 weeks. Absolutely brutal
The way to get them is extremely obscure so I am not at all surprised that they were never found until now. Looking at it now, this looks like a bad schoolyard video game urban legend. But it is real…

Lessons from the past...
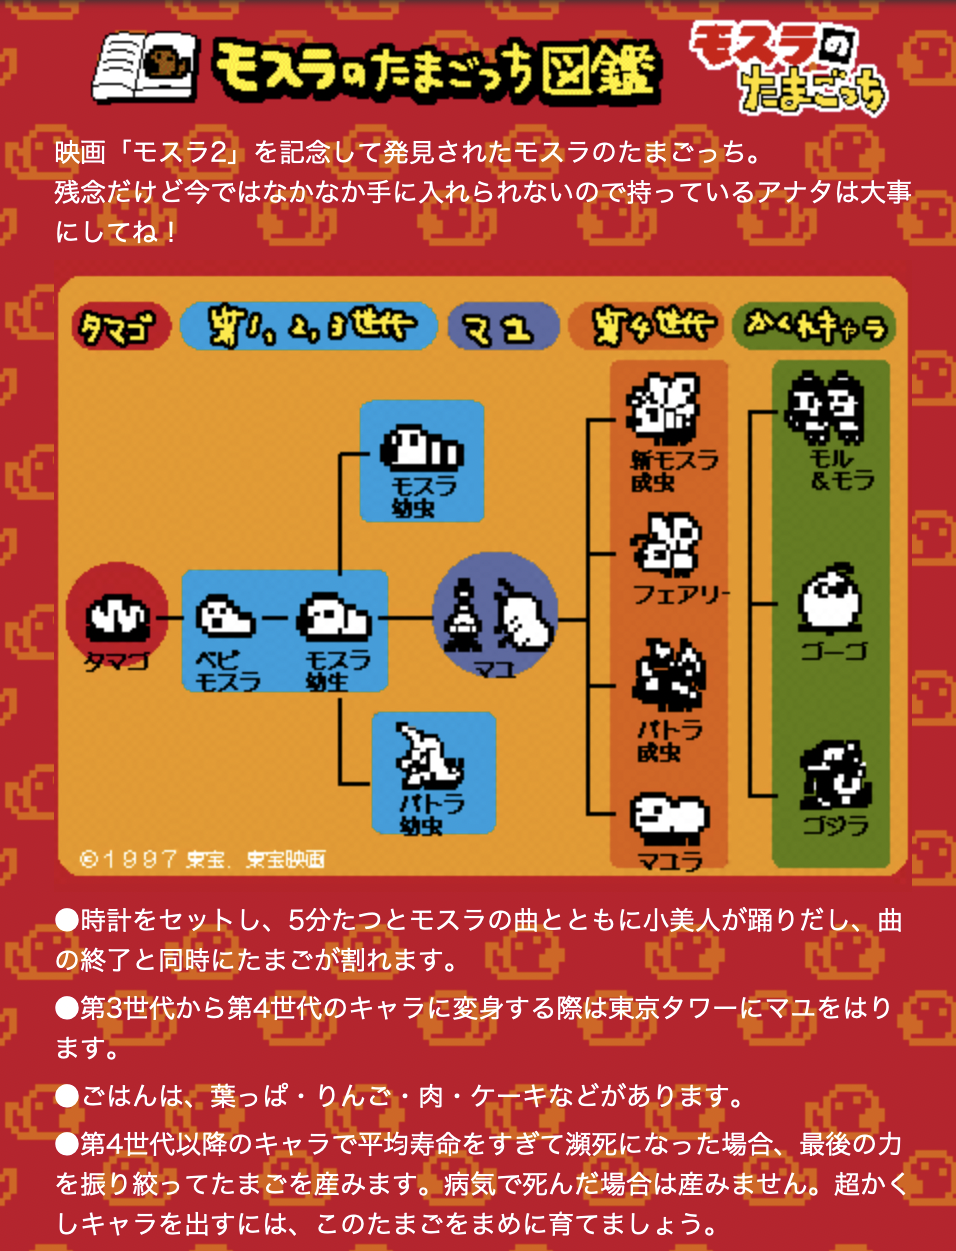
I think it’s worth noting that the old Tamagotch Channel website did capture some of the requirements correctly — that you need to kill an adult that’s “passed the average lifespan” and raise an egg from it to get Moll & Lora. It even noted that killing the adult from sickness will cause it not to lay an egg. However, the weight requirement made it extremely unlikely that anybody would ever get Moll & Lora, since most players try to keep weight low (and weight generally hovers near minimum anyway unless you feed a lot of candy)

This single page held so many secrets...
Immortality Strat
I mentioned the immortality strat. WTF is that, you are probably wondering?
This was the 2nd completely bonkers discovery that came out of my analysis.
The Mothra programming basically included a cheat code, where if you feed a character a certain number of candies, it can no longer get sick and if it’s an adult that’s passed the ‘average age’ threshold, will cause it to stop getting needier. This basically means the Mothra will never die unless you make too many care mistakes.
Now, Mothra Leo has a low chance of getting sick — it has only about a 12.75% chance of getting sick if you’ve fed it no candies. But still, if you get unlucky and it gets sick too many times, all your hard work goes to waste. So for safety, you might want to use this strat.
Here are the numbers:
- Baby Mothra: 21 (I don't think this actually works for the baby though, baby stage works differently)
- Mothra Larva: 21
- Mothra Grub: 30
- Batora Grub: 30
- Mothra Leo: 39
- Fairy: 33
- Batora: 33
- Mayura: n/a (for technical reasons, immortality strat does not work for Mayura; its base % chance of sickness is too high)
- Ghogo: 21
- Godzilla: 33
- Moll & Lora: 33
Notes on sickness
Some final notes about sickness that might be informative as you try to plan out a Moll & Lora run:
- Sickness is based on a countdown that is randomized when the character first evolves, and when the character wakes up every day. So for Mothra Leo, it has about 5 chances to get sick during its lifetime BEFORE the Moll & Lora conditions are met (and possibly more chances after they have been met, while you are trying to kill it from care mistakes). So it is possible for it to die from sickness if you are unlucky.
- How likely a character is to get sick when the countdown expires is a bit random, and is different for each character — Mothra Leo has the lowest base chance at 12.75% and Mayura has the highest base chance at 93.75%.
- The likelihood that a character becomes sick when the countdown expires increases for every 3 candy it eats. Then it hits that sweet spot, and it can no longer become sick. But if you feed more candy, it will leave the sweet spot and have an extremely high chance of getting sick.
- The same logic is roughly used when deciding how much needier the Tama will get after passing the ‘average age’ threshold. Basically, if the Mothra meets the criteria for getting sick, it will decrement hearts 15 minutes faster every 12 waking hours. This is not random like sickness is.
- If you’re in the sweet spot, it will not get needier as it gets older. This is why I'm calling this the immortality strat... as long as you don't make care mistakes, the Mothra will actually live forever.
- Technical note: If your Mothra has started getting needier, and you push it into immortality afterward, it remains at that level of neediness; it does NOT revert to its base level of neediness.
- A character dies when it gets sick 4 times (this resets on evolution, so sickness in the child stage does not count towards death in the adult stage)
- The internal counter that keeps track of how many candy the character has eaten (modulo 3) does NOT reset on evolution, so for example if you fed one candy in the child stage, you could feed 38 candy to Mothra Leo and it will enter the immortality sweet spot. So you need to be very careful about feeding candy if you want to use the sweet spot. The numbers I gave for each character will always work as long as you haven’t fed any candy earlier in the same stage.
- I think the explanation above confused people, so let me try something a little more graphical. Please be kind, I am horrible at anything art-related.
- Consider the graphic below:

- In this we assume that we start with Mothra Grub, and it has never been fed a single candy in its life. At each point on the timeline marked by a snack, we feed it a snack. The counter X rolls over to 0 on every 3rd candy fed. The counter Y increments on every 3rd candy fed. The counter Y is what's actually when used when deciding whether to make the Tama sick or get needier as it gets old. When this counter reaches a certain number, the Tama has entered immortality.
- The number that Y needs to be for immortality is character-specific; for Mothra Leo we need Y = 13, but for Mothra Grub we need Y = 10.
- The counter Y resets on evolution, so the character resets to its base chance of sickness on evolution. The counter X, however, does NOT reset on evolution. So since X was 1 when we evolved to Mothra Leo, it only takes 2 snacks to cause Y to increment. However, feeding 39 snacks will always cause Y = 13 regardless of what X was when Mothra Leo evolved. If this doesn't make sense, take a second look at the timeline -- after feeding 3 snacks, we still have Y = 1. That pattern repeats up until you've fed enough snacks to get Y = 13 -- the only thing that changes is that X = 1 after feeding 39 snacks, instead of X = 0 if you'd never fed a snack before (or if you'd fed multiple of 3 snacks to keep X = 0)
- Note that the counter X DOES reset when you hatch a new Mothra, so you don't need to worry about snacks fed during previous generations affecting the current character.
One final reveal...
If you made it this far without your eyes glazing over I just want you to know I’m proud of you.
There is actually a 3rd completely bonkers thing I discovered in the Mothra.
There is an undocumented secret character.

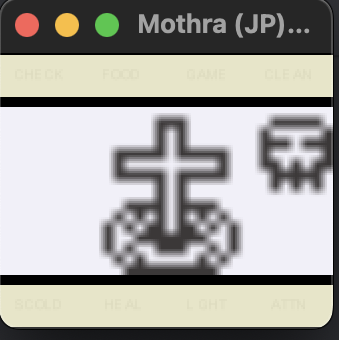
Yep. You can evolve to a moving Mothra grave. I finally got it on the real device on July 28th, it took about 78 days (with very little pausing or clock manipulation) to get it.
I have decided to name it Lucky Haka-Kun (墓 ‘haka’ is Japanese for grave) and I think everybody else should call it that too. The condition for this character is that you have to meet the conditions for Moll & Lora 5 times in a row. The 5th time, instead of evolving to Moll & Lora, Mothra Leo will evolve into Lucky Haka-Kun. This character is functionally identical to Moll & Lora and has the same stats as them. You can play with it just like a normal Mothra.
This isn’t actually unprecedented tbh, since the Lucky Unchi-Kun on the Angel is technically a moving death state sprite as well. Of course, this pretty much blows open all other Tama devices for possible other extremely-well-hidden secrets. I think this is the first time there’s been an actual raiseable character that is completely undocumented, its existence not even hinted at. Something Tama fans always thought was possible, whispered about in hushed tones, but dared not dream of…
(Bobette on the Tamagotchi Discord later pointed out that maybe Lucky Haka-Kun WAS hinted at -- the Tamagotch Channel's advice for getting a "超かくしキャラ", or super-secret character, is to make a generation 4 or later character lay an egg -- this hint never specifically names Moll & Lora and it applies to getting both the twins as well as Haka-Kun, so it's conceivable that the website intended to hint at both characters. The operative phrase here is "or later" which doesn't make sense if the hint only meant to refer to Moll & Lora)

(btw I would bet 5 bucks that there is an ultra-secret evolution in the Genjintch into the skull sprite that is used as that device’s egg)
Extra notes if you're going for Lucky Haka-Kun
- Once you have Moll & Lora, all you need to advance to the next stage is that they need to lay an egg before dying. So the twins just need to survive approximately 64 waking hours, and then you kill them by letting the hearts empty. (lol I'm just realizing how macabre it sounds to say you're killing the Tama characters)
- You don't need to take care of Moll & Lora like you take care of Mothra Leo. It's OK to make care mistakes and the weight no longer matters.
- The main thing is that you don't want them to die of sickness, and Moll & Lora do have a higher chance of getting sick than Mothra Leo (25% chance every day), so you may want to use immortality strat on them. 33 candies are what you use to push Moll & Lora to immortality.
Mothra fast-forward mode
This Instagram post shows the Mothra in a peculiar mode, where pressing the C button causes it to move at a high speed, only slowing down when it calls for attention, poops, etc -- basically any 'event' in the Mothra. The person who posted this didn't reveal how they did it, but I figured it out as part of the Mothra analysis effort.
I'd noticed something unusual, which is that the Mothra code reads 4 inputs, which is 1 more than you'd expect for a device with 3 buttons. But once I saw the Instagram post I figured it was related to this weird fast-forward mode -- which it was, I was able to confirm its existence in the code.
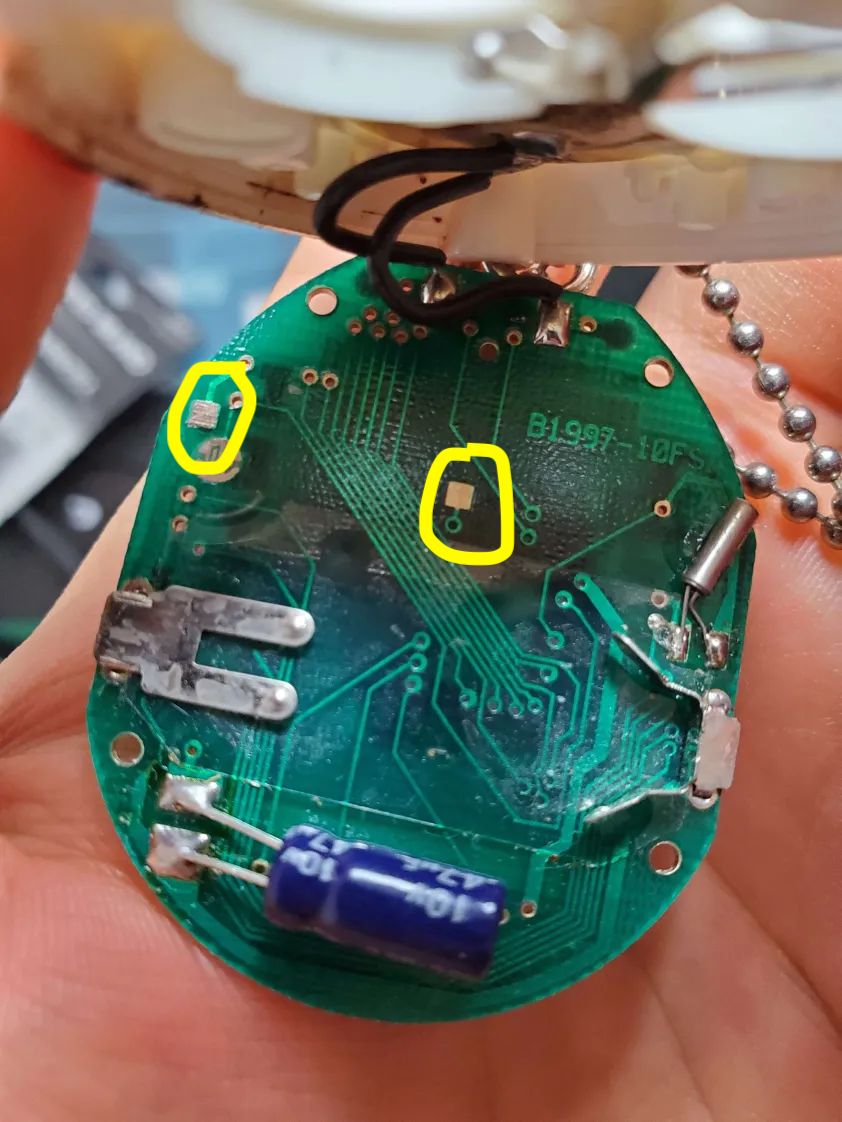
Natalie suggested that this could probably be activated by jumpers somewhere on the board, and I identified two possible spots. (azya later identified which of the spots was correct, which I wished I'd seen before soldering the wrong points together and temporarily bricking the board). See this image:

Solder the two square pads together and that should do it. I activated it as a proof of concept by jumpering the two pads, jamming the unit back together without screwing anything in, and holding it together by hand. But it did seem to work as expected.
Unfortunately though I suck at soldering so I had a really hard time getting the unit back together (there were 2 large blobs on the pads and excess wire crowding the device) and once I finally got it back together, it was no longer working. So all this to say, I take no responsibility if you accidentally brick your Mothra. But if you're better at soldering than me, maybe it's worth giving a shot. It'd definitely be way faster to get to Haka-Kun if you can pull it off...
Mothra bonus fun facts...
Some facts about the Mothra 'business logic' I noticed while looking through its code. This isn't on the Discord because that post is already way too long.
- Care mistakes do reset on every evolution, unlike with the P1/P2.
- The Mothra uses randomness in a LOT more places than the P1/P2. The P1/P2 only use it in the game, but the Mothra uses it when deciding whether to call for discipline, whether to get sick... even the time to evolution is somewhat random.
- I'm not sure I fully understood how the randomness works, but I basically considered it as a uniform 1/10 chance for a digit 0-9 or a uniform 1/16 chance for a digit 0-15. (there were 2 RNG values in decimal and 2 in hex) Very possible this understanding is wrong, but I wasn't convinced I could accurately simulate the RNG output since it relies on the carry flag which may or may not be set depending on what the code was doing before fetching an RNG value. So it is somewhat nondeterministic. I considered my assumption 'close enough' and rolled with it.
- Having 8 poops on the screen makes the Mothra sick. (well specifically, having 7 poops, then the Mothra pooping again, will make it sick instantly). The P1/P2 do this too.
- The Mothra can die for a few different reasons, 2 of which I've already mentioned:
- Being sick for 6 hours
- Having empty hearts for 12 hours
- Getting sick 4 times
- After the time to evolution is reached for an adult, 5 hungry/happy care mistakes are made
- In the Mothra there are separate timers for each type of care mistake. So if the happy and hungry hearts are both empty at the same time, it can register 2 care mistakes when the 15 minutes elapse. The P1/P2 can't do this, they just have 1 timer that gets overwritten when the next call is made. This is how you got oldie strat, since the calls for attention can overwrite each other too frequently for a care mistake to ever be registered.
- The game is random but influenced by the Justice meter - 0% Justice has the highest chance of winning a selection (68.75%), 25-50% Justice has the lowest chance (43.75%) and 75-100% has a slightly-above average chance (56.25%). There are no patterns and it doesn't matter where you select -- when you press the button the game decides whether you were correct or not and then has the character pop out of a hole accordingly. This is like the P1 game which also is not influenced by your choice of direction.
- Poop is every 3 waking hours and is not random at all.
- The time to the next evolution is 16 * (character-specific stat) + (random number between 8 and 15) hours, and 10 * (current ten's place on the clock) + (random number between 0 and 9) seconds. It's kind of interesting that it's not random for the ten's minutes place, but uses the clock - it may have been more efficient from a code perspective to do this since this means you don't have to waste instructions checking if a random number is between 0 and 5, and adjusting accordingly.
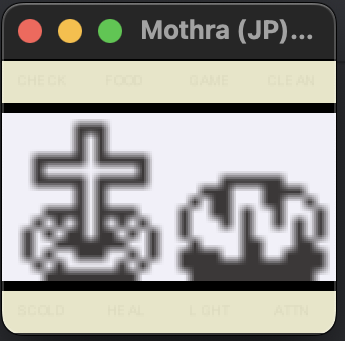
- Each character basically has an index into a table that determines what it is -- this includes the egg, the cocoon, and the normal death sprite. Lucky Haka-Kun has its own character index, which was the first indication that something may be special about it. There is another character index that is like a weird, glitchy moving cocoon, but I was not able to find any indication that it is used in the code. It's not something a character can evolve into, and it's not involved in the logic of turning into the cocoon. So if it is used I have no idea where. Here it is in MAME -- Wolf Nanaki from the Discord also got it once from a battery glitch, so this isn't an issue with the ROM, it's in the actual device:
- Lucky Haka-Kun is NOT a glitch, it is very clearly part of the growth chart logic.
- When the Mothra is sick, it won't eat a meal or play games, but you can feed it candy and that will boost its happiness as usual. I had noticed this in the code, but testing shows it actually does work like that. Just thought this one was a little weird lol
- Chance of calling for discpline every hour is 25%.
- A discipline calls lasts for 15 minutes and then stops, just like a call that's made because of happy/hungry hearts being empty.
- The 'type one'/'type two' distinction for the teen stage (where depending on the Justice value as a child, the teen has either 0% or 50% Justice when it evolves) doesn't explicitly affect the growth chart in the way it does for the P1/P2, but the 'type two' Batora Grub (starting with 0% Justice) only makes 3 discipline calls, so it can't evolve into Fairy which requires 100% Justice from Batora Grub.
- Every time the character wakes up or evolves, the Mothra rolls a random time in the next 10 hours that it might get sick. So if the Mothra has been awake for 10 hours (which all characters are awake for at least 12 hours), it is basically 'safe' and won't get sick before going to bed. This is a code convenience thing since it's easy to generate a random number between 0 and 9 or one between 0 and 15, but it would be difficult to generate a random number spanning the entire waking day of the character (12-14 hours).
- It may be helpful to record when the Mothra evolves. From what I can tell in the code, every hour after evolution is when it checks to see if a justice call should be made. So if it evolved at 12:52 then you could get a call at 13:52, 14:52, etc. Note that this is not actually tied to the Tama's clock, it's tied to the hidden evolution timer -- so if you pause or manipulate time, you will likely throw off this nice pattern. I'm a little shaky on this theory so I haven't been depending on it during my own runs though (since in the code, specifically what happens is at the hour rollover a flag gets set that later allows the justice call checks to take place; and I'm not positive what triggers the check on that flag. So there's an additional layer of indirection). Still, this might be a handy rule-of-thumb to be aware of.
- I had to double-check this because I wasn't sure - the time spent in the cocoon does NOT count towards the 72-80 hours of waking time as Mothra Leo. The evolution timer counts up during the cocoon stage but gets reset when it hatches.
Scripts, notes, and other stuff
Some random stuff I generated during the analysis process.
Credits
- azya (twitter, github -- check out the BrickEmuPy project!) did the work of dumping the image into a ROM format. I also got critical help from them getting the MAME emulator to correctly run the Mothra ROM so I could figure out how the code works and run tests. Azya also helped figure out how to activate the fast-forward mode in the Mothra. Azya came out of nowhere and generated the ROM dump super fast; if that hadn't happened there's a high probability you wouldn't be reading this page right now!
- Folks like natashenka, ShroomHWD, teallen, sg, azureinferno, RJ, and the other residents of #tamagotchi-de-hackin who gave me the Tamagotchi hacking brainworm....

